

Table of Contents
- How to Clean Exterior Siding: What You Need Before You Start
- How to Clean Vinyl Siding Without Damage
- Homemade Siding Cleaning Solution That Works
- How to Clean Siding Without a Pressure Washer
- Removing Mildew, Mold, Algae, and Stubborn Stains
- Pressure Washing Siding: Settings and Technique by Material
- How Often to Clean House Siding (and Prevention Tips)
- Conclusion
- Frequently Asked Questions
Last Updated: October 19, 2026
How to Clean Exterior Siding: What You Need Before You Start
To clean exterior siding means removing dirt, algae, mildew, and pollen from your home's outer walls with the right tools, a safe solution, and a method matched to the material.
The good news: you can handle most of this yourself in an afternoon. Below, we walk you through the tools, the solutions, and the technique, plus the mistakes that cause the most damage.
Tools and Supplies Checklist
Gather everything before you climb a ladder, so you're not stuck mid-job without a nozzle or brush.
- Garden hose with a spray nozzle
- Two buckets (one for solution, one for rinse water)
- Soft cloth or soft-bristle brush
- Long-handled brush with an extension pole
Preparation and Protection of Nearby Areas
Before any water or cleaner comes out, close windows and doors, cover light fixtures, outlets, and AC units with plastic sheeting, and move patio furniture, grills, and planters away from the wall.
Soak nearby plants and shrubs with plain water before you start. Wet foliage absorbs less cleaner runoff. Cover anything you can't move.
How to Clean Vinyl Siding Without Damage
Vinyl siding is the most forgiving exterior material to clean, and a soft brush with a mild solution handles most of it. Work from the bottom up, rinse often, and never let cleaner dry on the surface.
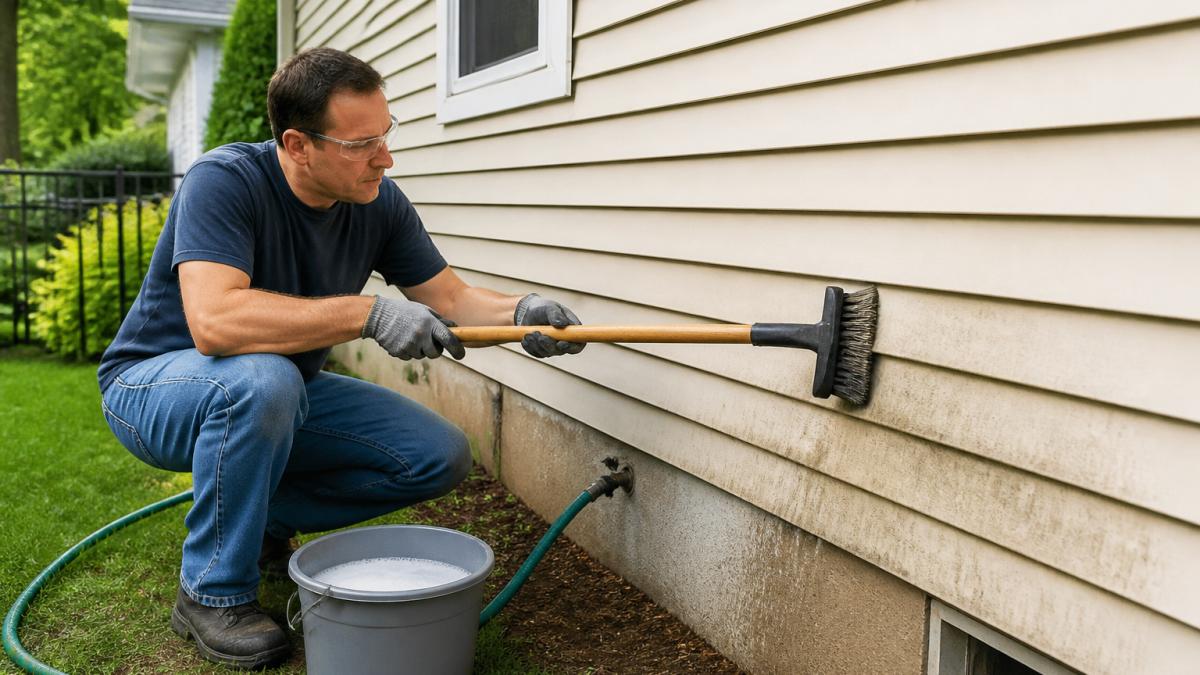
Vinyl's textured surface traps dirt in the grain, so a quick spray rarely gets it fully clean. You need light agitation with a soft-bristle brush to lift grime out of the texture.
Step-by-Step Vinyl Cleaning
- Rinse the wall from top to bottom with the garden hose to knock off loose dirt.
- Apply the solution from the bottom up with a pump sprayer or brush, starting at the lowest point and working upward. This prevents dirty streaks from running over clean sections.
- Scrub gently with a soft-bristle brush, using a side-to-side motion. Don't press hard.
- Let it sit for about ten minutes. Don't let it dry.
- Rinse thoroughly from top to bottom.
- Check for missed spots and repeat on stubborn areas.
A common mistake is scrubbing in circles with a stiff brush. That dulls the finish and can leave visible scuff marks on darker vinyl.
Homemade Siding Cleaning Solution That Works
A simple mix of mild dish soap and warm water cleans most ordinary dirt and grime. For mildew or green stains, add bleach or switch to vinegar.
Mix one-third cup of mild dish soap into a gallon of water for general cleaning; for heavier soil, a store-bought siding cleaner mixed to label directions works too. Always test any new solution on a hidden section, like behind a downspout, and let it dry fully before committing to the whole wall.
Cleaner Compatibility by Siding Material
Not every cleaner is safe on every surface. Use this as a starting point, and when in doubt, choose the gentler option and spot-test first.
| Siding Material | Safe Routine Cleaner | Use With Caution | Avoid |
|---|---|---|---|
| Vinyl | Dish soap and water; diluted bleach for mildew | Vinegar (fine for light algae) | Solvent-based cleaners, undiluted bleach |
| Wood (painted or stained) | Mild dish soap and water | Oxygen bleach on mildew; oxalic acid on rust | Chlorine bleach on stained wood, ammonia |
| Fiber cement | Mild dish soap and water; diluted bleach | Vinegar for light algae | Acid-based cleaners that etch the surface |
| Aluminum | Mild dish soap and water | Diluted bleach on mildew | Ammonia, abrasive cleaners that strip paint |
| Stucco | Mild dish soap and water | Diluted bleach on mildew | High-pressure rinsing, acid cleaners |
| Engineered/composite | Manufacturer-recommended cleaner | Diluted bleach on mildew | Solvents, stiff brushes |
Chlorine bleach is the go-to for mildew on vinyl and fiber cement, but it can lighten stained wood and reacts badly with ammonia-based cleaners. Vinegar is gentler on plants and nearby surfaces, making it a good first choice for light green algae on any material.
Bleach-to-Water Ratio and Vinegar Solution
For mildew and mold, use a diluted bleach solution. A common approach is one part household bleach to four parts water, applied with a pump sprayer or soft brush. Let it sit about ten minutes, then rinse well. Never use a stronger mix than the label allows, and never let bleach dry on the surface.
For lighter green algae and general brightening, mix one part white vinegar to one part water.
Safety and Handling Basics
- Wear rubber gloves and safety glasses whenever you handle bleach or a store-bought cleaner.
- Keep children and pets away from buckets and sprayers.
- Never decant cleaners into unlabeled bottles.
- Rinse plants and grass with plain water before and after cleaning to dilute runoff.
If a cleaner's label conflicts with anything here, follow the label. Manufacturer instructions override general guidance.
How to Clean Siding Without a Pressure Washer
You can clean siding thoroughly with a garden hose, a brush, and a sprayer. Pressure washing is optional, and for many homes the gentler method is safer.
Brush, Cloth, and Sprayer Technique
- Soft cloth: best for small areas, door frames, and spots near windows.
- Soft-bristle brush: the workhorse for textured siding and general grime.
- Long-handled brush: reaches the second story without a ladder.
- Pump sprayer: applies solution evenly across large walls.
Work in sections of about ten feet. Apply solution, scrub, wait, and rinse before moving on. This keeps the cleaner from drying and gives you a consistent finish.
Removing Mildew, Mold, Algae, and Stubborn Stains
Mildew looks like powdery dark spots, often on the north side where moisture lingers; algae shows up as green downward streaks; mold is darker and fuzzier. All three feed on moisture and organic debris on the siding surface.
The bleach solution above handles all three. Apply it, let it sit for ten minutes, scrub lightly, and rinse. For heavy growth, a second application usually finishes the job.
Safety Protocol for Mildew and Bleach
Mildew cleaning is where safety matters most, since bleach is involved and the work is often overhead.
- Wear rubber gloves, safety glasses, and long sleeves; add a hat or hood if spraying overhead.
- Work outdoors with plenty of ventilation; never use bleach solutions in an enclosed space.
- Add bleach to water, never the reverse, and never mix bleach with vinegar, ammonia, or other cleaners.
- Keep pets and children away from the work area and runoff.
If you're sensitive to bleach fumes or the area is large, a store-bought mildew cleaner formulated for siding may be easier to handle. Follow its label exactly.
Troubleshooting Persistent Stains
Some stains need a different approach:
| Stain Type | Likely Cause | Fix |
|---|---|---|
| Green streaks | Algae | Vinegar or diluted bleach solution |
| Dark powdery spots | Mildew | One part bleach to four parts water |
| Rust-colored marks | Metal runoff or fertilizer | Oxalic acid cleaner, test a hidden spot first |
| Chalky white film | Oxidation | Won't wash off; it's a sign of aging siding |
| Sticky amber spots | Tree sap | Mineral spirits on a rag, then rinse; test first |
| Stubborn grime in texture | Built-up dirt | Soft brush plus longer dwell time |
For rust, oxalic acid cleaners are common but can etch some surfaces, so test a hidden spot and rinse thoroughly. For sap, a little mineral spirits on a rag lifts it, but keep it off painted trim and rinse right away. If a stain won't lift after two tries, stop, repeated scrubbing damages the finish. That chalky film is oxidation: the siding's protective layer is breaking down, and no cleaner reverses it.
When to Call a Professional
Most surface mildew and algae are a weekend job. Call a professional when growth covers a large portion of the wall, returns within weeks, or comes with soft spots, bubbling paint, or loose panels, signs of moisture behind the siding that cleaning alone won't solve.
Pressure Washing Siding: Settings and Technique by Material
Pressure washing cleans siding fast, but the wrong setting damages it. Keep the nozzle at least three feet from the surface and use a wide fan tip.
Here's how settings should differ by material:
| Material | Pressure Level | Notes |
|---|---|---|
| Vinyl | Low to medium | Wide tip, keep moving, never hold in one spot |
| Wood | Low | Can gouge and fuzz the grain; use a brush instead |
| Fiber cement | Low to medium | Avoid forcing water behind panels |
| Stucco | Low | High pressure cracks and pits the surface |
| Aluminum | Low | Can dent and strip paint |
Always test a small hidden area first. Rinse top to bottom, soap bottom to top, and never spray upward into seams, water forced behind siding gets trapped and leads to rot.
If your siding is already showing cracks, loose panels, or soft spots, pressure washing makes it worse. Dunn Wright's Exteriors offers a free siding consultation to check for damage and talk through repair versus replacement.

How Often to Clean House Siding (and Prevention Tips)
Most homes need a full wash once a year, ideally in spring after pollen season. Homes under heavy tree cover or in humid, shaded areas may need it twice a year.
Prevention cuts the work:
- Keep gutters clear so water doesn't run down the walls
- Trim shrubs back a foot from the siding
- Fix leaky hoses and sprinklers that spray the house
- Rinse pollen off after heavy spring buildup
Routine cleaning also lets you spot cracked caulk, loose panels, or soft spots early, catching those is far cheaper than a replacement.
Conclusion
Cleaning your siding is straightforward once you match the method to the material and respect a few safety rules. The harder challenge is knowing when cleaning stops being enough and the siding itself is failing.
If you're seeing cracks, fading, or stains that keep coming back, our team at Dunn Wright's Exteriors can help. We also work with all homeowners insurance companies and can guide you through the claims process if storm damage is involved.
Frequently Asked Questions
What is the best homemade solution for washing my house's exterior?
A simple homemade siding cleaning solution mixes 1 gallon of water with 1/3 cup of white vinegar or 1/2 cup of mild dish soap. For mildew, use a diluted bleach mix of 1 part bleach to 4 parts water. Apply with a pump sprayer or soft brush, scrub gently, and rinse thoroughly. Always test a small area first and wear eye protection. This approach works well for vinyl and most painted siding without harsh chemicals.
Can you clean siding without a pressure washer?
Yes. You can clean siding without a pressure washer using a garden hose, a long-handled soft-bristle brush, and a pump sprayer. Wet the siding, apply your cleaning solution from the bottom up, scrub with side-to-side motion, and rinse from top to bottom. This method is safer for textured siding and painted surfaces, and it avoids the risk of water damage that high pressure can cause.
How often should I clean my house siding?
Most homes need a full siding cleaning once a year, but in humid or storm-prone areas, twice a year may be necessary. Check for green algae, mildew, or dirt buildup every few months. Regular cleaning prevents stains from setting and extends the life of your siding. If you notice persistent mold or damage after cleaning, a professional inspection can determine if repair or replacement is needed.
Is it safe to pressure wash house siding?
Pressure washing is safe only with the right settings and technique. Use a wide-angle nozzle (40-degree or higher), keep the nozzle at least 3 feet from the surface, and never aim upward under siding panels. High pressure can force water behind siding, damage paint, and crack vinyl. For fiber cement, wood, or stucco, avoid pressure washing entirely and use a soft brush and gentle cleaner instead.